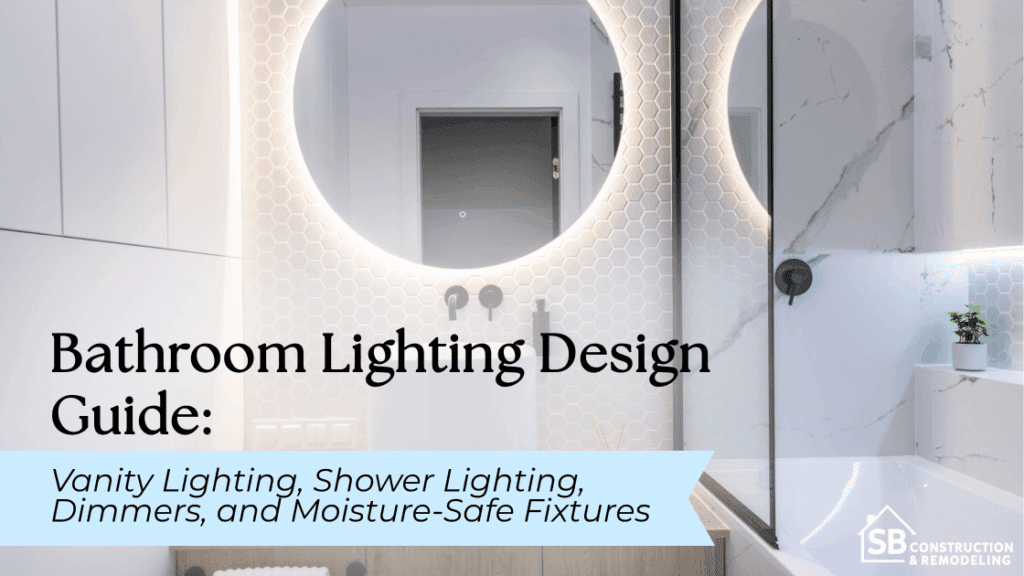
Good bathroom lighting design starts with layers, not one bright fixture in the middle of the ceiling. A useful plan combines task lighting at the mirror, ambient light for overall visibility, accent or decorative light for visual depth, and dedicated shower lighting selected for the actual moisture exposure.
The strongest bathroom lighting plans coordinate those layers with the vanity, mirrors, cabinetry, shower enclosure, finishes, electrical layout, and controls before construction begins. Brightness matters, but so do light direction, color quality, dimming, fixture ratings, and installation requirements.
For a Los Angeles remodel, electrical changes also need to be considered alongside current California energy requirements and the local permit process. The California Energy Commission’s current residential lighting guidance and the rules of the agency with jurisdiction should be checked for the specific project.
Start With a Layered Bathroom Lighting Plan
A well-designed bathroom generally uses four lighting layers:
- Task lighting provides focused, even illumination for shaving, makeup, skincare, contact lenses, and other close-up routines.
- Ambient lighting provides comfortable overall visibility throughout the room.
- Accent and decorative lighting adds visual interest and can highlight tile, cabinetry, niches, or architectural details.
- Shower lighting improves visibility inside an enclosure while accounting for moisture exposure and fixture-listing requirements.
The goal is not simply to make the bathroom brighter. Different activities need light in different places. Grooming benefits from light directed toward the face, while cleaning may call for stronger overall illumination. Bathing may feel more comfortable with lower light levels, and nighttime use may benefit from a separate low-level source.
That is why bathroom lighting should be developed as part of the overall bathroom remodeling plan rather than treated as a final fixture-selection exercise.
Task Lighting for Grooming and Daily Routines
Bathroom task lighting should illuminate the face without creating deep shadows under the eyes, nose, and chin. Vanity sconces, properly selected mirror lighting, or a combination of sources can provide better facial illumination than a strong ceiling light alone.
Ambient Lighting for Overall Visibility
Ambient bathroom lighting may come from recessed fixtures, surface-mounted ceiling lights, or other broad sources. Its job is to make circulation, cleaning, storage, and general bathroom use comfortable without forcing the vanity lights to illuminate the entire room.
Accent and Decorative Lighting
Accent lighting can highlight a textured wall, shower niche, floating vanity, or other design element. Decorative fixtures add personality, but they should complement the functional lighting plan rather than replace it.
How to Design Vanity Lighting That Reduces Facial Shadows
Vanity lighting works best when light reaches the face from useful directions instead of shining almost entirely from overhead. The right arrangement depends on the mirror size, vanity width, ceiling height, fixture design, and available wall space.
A practical placement comparison is:
- Side-mounted sconces: Often the strongest option for even facial illumination because light can reach both sides of the face.
- Above-mirror lighting: Useful where side wall space is limited or the mirror configuration makes sconces impractical.
- Integrated mirror lighting: Can provide a clean contemporary appearance, but the actual forward light output should be checked rather than assuming every illuminated mirror is sufficient for grooming.
Avoid choosing a vanity fixture based on appearance alone. Beam spread, diffuser design, light output, color quality, glare, and the relationship between the fixture and mirror all affect how the space performs.
Side-Mounted Sconces for More Even Facial Lighting
Sconces placed to either side of a mirror can reduce the strong downward shadows created by overhead-only lighting. The objective is balanced illumination around approximately face level, adjusted for the actual fixture dimensions and mirror.
Positioning Lights Beside a Single Mirror
With a single mirror, sconces generally work best when they visually frame the mirror without being crowded against its edges. Final positioning should be coordinated with the vanity height, mirror dimensions, electrical boxes, medicine cabinets, backsplash, and fixture projection.
Avoid committing to electrical-box locations before the exact mirror and sconces are selected.
Planning Sconces Around Double Vanities
A double vanity may use a sconce at each outside edge, fixtures between mirrors, or another balanced arrangement. Rather than following a fixed spacing formula, design around where each person stands and how each mirror will be used.
A detailed elevation drawing can reveal conflicts that are difficult to see on a floor plan.
When an Above-Mirror Vanity Light Makes Sense
An above-mirror fixture can be practical in a narrow bathroom, above a wide mirror, or where cabinetry and wall dimensions leave little room for sconces.
Choose a fixture that distributes light toward the user instead of concentrating most of its output on the ceiling or wall. A long vanity bar is not automatically better simply because it spans more of the mirror.
Integrated LED Mirrors and Backlit Mirrors
An LED bathroom mirror can simplify the visual composition, but “lighted” and “backlit” do not always mean the same thing. Some mirrors provide forward-facing task light, while others primarily create a glow on the wall.
Check the manufacturer’s specifications for light output, color temperature, color rendering, dimming, electrical requirements, and replaceable or serviceable components. California’s residential Energy Code also contains specific treatment for lighting integral to bath vanity mirrors, so product specifications should be reviewed in the context of the complete installation.
Avoiding Glare, Harsh Shadows, and Uneven Lighting
Glare often comes from exposed high-output sources, poor fixture placement, highly reflective surfaces, or light aimed directly into the eyes. Frosted diffusers and well-positioned sources can help soften the effect.
Also consider the mirror itself. A large mirror reflects fixtures, windows, and ceiling lights, so a fixture that looks comfortable from one position may be distracting from another.
Choose the Right Brightness and Color Temperature for a Bathroom
Three specifications are especially useful when comparing bathroom lighting:
| Specification | What it tells you |
| Lumens | How much visible light a source produces |
| Color temperature, or CCT | Whether white light appears warmer or cooler |
| Color rendering index, or CRI | How accurately colors tend to appear under the light |
There is no single lumen target that works for every bathroom. Room size, ceiling height, daylight, surface colors, fixture distribution, user preferences, and the number of lighting layers all change the amount of useful light required.
Understanding Lumens Instead of Relying on Wattage
Watts describe electrical power consumption, not brightness. Lumens describe light output. This distinction is especially important with LEDs because two products using similar wattage can produce different amounts or distributions of light.
The ENERGY STAR lighting criteria also distinguish light output in lumens from power input in watts.
Selecting a Comfortable Color Temperature
Correlated color temperature is measured in kelvin, abbreviated K. Lower values such as 2700K to 3000K appear warmer, while 4000K and higher appear cooler.
Many residential bathrooms feel comfortable somewhere in the warm-to-neutral range, but there is no universal “best” bathroom color temperature. Tile color, paint, natural light, wood tones, and homeowner preference all matter. If several fixtures share the room, keeping their color appearance coordinated usually creates a more intentional result.
Why Color Rendering Matters at the Vanity
CRI describes how faithfully a light source reveals colors compared with a reference source. Strong color rendering can be particularly useful for makeup, skincare, clothing, and evaluating finishes.
Under California’s 2025 residential lighting requirements, applicable JA8-certified light sources have specific color-performance criteria, including a CRI of at least 90. Homeowners comparing products can review the California Energy Commission’s residential lighting requirements rather than relying only on packaging claims.
Plan Shower Lighting for Visibility and Wet Conditions
Shower lighting should provide useful illumination while using a fixture appropriate for its installation location. The shower enclosure, ceiling height, showerhead position, spray exposure, fixture listing, manufacturer instructions, and applicable electrical requirements all matter.
A recessed or low-profile ceiling fixture is a common design approach because it can illuminate the shower without introducing a hanging fixture into a wet environment. However, fixture type alone does not establish that it is appropriate for a particular shower.
Recessed Lighting Above the Shower
Recessed shower lighting can keep the ceiling visually clean while delivering light into the enclosure. During a remodel, coordinate the fixture with ceiling framing, ductwork, exhaust ventilation, insulation, waterproofing details, and the shower layout before the electrical location is finalized.
California also has specific requirements for residential recessed downlights and qualifying light sources. Product selection should therefore account for both design and current energy-code requirements.
Position Shower Lights to Reduce Shadows
A shower light should illuminate the area where visibility is needed rather than simply being centered on the room. Depending on the enclosure and showerhead arrangement, a poorly positioned fixture can leave the controls, niche, or bathing area in shadow.
Glass enclosures and glossy tile can also create reflections. Review the lighting location from the user’s position, not only from the reflected ceiling plan.
Verify Fixture Ratings Before Installing Lights Near Water
Do not assume a fixture is shower-appropriate because it is marketed as a bathroom light. Look for the product’s environmental-location marking and installation instructions.
Where water may drip, splash, or flow against electrical equipment, wet-location requirements become particularly important. A qualified electrical professional should confirm the correct fixture and installation for the specific location under the currently adopted electrical code and local amendments.
Understand Damp-Rated vs. Wet-Rated Bathroom Light Fixtures
Damp-rated and wet-rated describe different environmental conditions. They are not interchangeable labels, and not every fixture in a bathroom automatically requires the same rating.
UL’s luminaire marking guidance distinguishes damp locations, which may experience condensation or moisture, from wet locations, where water may drip, splash, or flow on or against electrical equipment.
| Damp-rated fixtures | Wet-rated fixtures |
| Intended for appropriate locations subject to moisture or condensation | Intended for locations where direct water exposure may occur |
| May be suitable for many moisture-prone areas outside direct spray exposure | Needed where the installation is classified as a wet location |
| Are not automatically suitable for wet locations | May also be suitable for damp locations, subject to the product listing and instructions |
What Damp-Rated Lighting Means
A damp location is generally an area that can be exposed to moisture or condensation without the direct water exposure associated with a wet location. A fixture listed for damp locations should be installed only where that rating is appropriate.
What Wet-Rated Lighting Means
A wet location is one where water or another liquid may drip, splash, or flow on or against electrical equipment. Fixtures used in such locations must be listed for the applicable wet-location conditions.
Even a wet-rated fixture can have restrictions involving mounting orientation or installation method, so the exact product instructions still matter.
Match the Fixture Rating to Its Actual Location
Avoid using a single distance from the tub or shower as a universal shortcut. The correct determination can depend on the adopted electrical requirements, physical installation, exposure to spray, fixture listing, and manufacturer instructions.
Before installation, confirm:
- The damp- or wet-location marking
- Approved mounting orientation
- Ceiling or wall compatibility
- Any sealing requirements
- Light-source and driver specifications
- Dimming compatibility, when applicable
- Current California energy requirements
- Requirements of the local authority having jurisdiction
The California Building Standards Commission’s current Title 24 code information is a useful starting point for identifying the active statewide code cycle.
Use Dimmers to Make Bathroom Lighting More Flexible
Dimmers allow one bathroom to support very different routines without forcing every fixture to operate at full output. They can provide brighter vanity lighting for detailed tasks, softer ambient lighting for bathing, and lower illumination for early-morning or evening use.
The best control strategy usually combines dimming with separate lighting zones rather than putting the entire room on one switch.
Put Vanity, Ceiling, and Accent Lights on Separate Controls
Separate controls allow homeowners to use only the lighting they need. Vanity lights, general ceiling lights, accent lighting, and low-level night lighting may serve different purposes.
California’s 2025 Energy Code adds another consideration for new or altered residential lighting. In bathrooms, at least one installed luminaire must be controlled by an occupancy or vacancy sensor that provides automatic-off functionality. The exact control arrangement should be coordinated with the applicable project requirements.
Confirm LED Fixtures and Dimmers Are Compatible
Not every LED fixture behaves properly with every dimmer. Poor pairings may create flicker, buzzing, limited dimming range, or unstable operation.
Review the fixture manufacturer’s compatibility information before purchasing the controls. California’s current single-family lighting guidance also addresses compatibility for certain forward phase-cut dimmers controlling LED sources.
Add Low-Level Lighting for Nighttime Use
Low-level lighting can make nighttime trips easier without illuminating the entire bathroom at full brightness. Options may include a small dedicated fixture, toe-kick lighting, or another appropriately designed low-output source.
The control method and product still need to fit the applicable electrical and energy requirements.
Coordinate Decorative Fixtures With the Bathroom Design
Bathroom light fixtures are part of the room’s architecture, not isolated accessories. Their scale, shape, finish, and position should work with the vanity, mirrors, faucets, cabinetry, tile, and other visible elements.
Use this five-point fixture checklist:
- Scale: Is the fixture proportionate to the mirror and vanity?
- Placement: Does it illuminate the user effectively?
- Finish: Does it complement the room without requiring every metal finish to match?
- Glare: Will the source be uncomfortable when viewed in the mirror?
- Visual balance: Does the fixture composition work with cabinetry, mirrors, tile joints, and ceiling elements?
Match Fixture Scale to the Vanity and Mirror
A fixture that looks appropriately sized in a product photo can appear too small or too large once placed beside a real mirror. Confirm actual dimensions rather than selecting by appearance alone.
Coordinate Lighting With Mirrors, Hardware, and Finishes
Lighting can repeat a hardware finish or provide a deliberate contrast. More important is consistency in the overall design language.
For homeowners still determining the sequence of bathroom selections, SB Remodeling’s guide on what to choose first during a bathroom remodel explains why layout and core construction decisions should come before decorative details.
Let Decorative Lighting Support, Not Replace, Task Lighting
A sculptural pendant or decorative sconce can add character, but its visual impact does not guarantee useful illumination. Plan the functional lighting first, then use decorative fixtures to strengthen the design.
SB Remodeling’s 3D design service may also help homeowners evaluate the relationship among layout, finishes, lighting, and other visible design elements before construction.
Avoid These Common Bathroom Lighting Design Mistakes
Many bathroom lighting problems begin during planning, long before a fixture is installed. The most common mistakes are:
- Depending on one ceiling light
- Creating harsh overhead facial shadows
- Ignoring damp- and wet-location ratings
- Putting every fixture on the same control
- Selecting fixtures before the mirror and cabinetry are finalized
Relying on One Ceiling Fixture
One central fixture may provide basic visibility but still leave the vanity, shower, and storage areas poorly lit. Layering gives each area the type of light it needs.
Placing Strong Light Directly Over the Face
A strong source directly above a person can create deep facial shadows. If grooming is important, add light that reaches the face from the front and sides.
Ignoring Moisture and Fixture Ratings
A visually attractive fixture is not necessarily listed for every bathroom location. Confirm environmental ratings before purchasing, particularly around showers and tubs.
Putting Every Fixture on One Switch
One-switch bathrooms offer little flexibility. Separating lighting zones makes it easier to adjust the room for grooming, bathing, cleaning, and nighttime use while also coordinating required controls.
Choosing Fixtures Before Finalizing Mirrors and Cabinetry
Early fixture purchases can create conflicts with mirror width, medicine cabinets, backsplashes, electrical boxes, and millwork. Resolve the major dimensions first.
Create a Bathroom Lighting Plan Before the Remodel Begins
Lighting decisions should be made before electrical rough-in, which is the stage when wiring and electrical boxes are installed before finished wall surfaces close the work.
That does not mean every decorative detail must be purchased months in advance. It does mean the project team should know the fixture type, approximate dimensions, mounting location, control strategy, and important specifications early enough to coordinate the construction drawings.
Finalize the Vanity and Mirror Layout
Start with the vanity width, sink locations, mirror dimensions, medicine cabinets, and backsplash. Then determine where sconces or above-mirror lighting can fit without creating visual or construction conflicts.
Map Each Fixture and Lighting Zone
Create a plan showing:
- Vanity task lighting
- General ceiling lighting
- Shower lighting
- Decorative or accent fixtures
- Low-level lighting
- Switching, sensors, and dimmers
On a more developed design set, a reflected ceiling plan shows the ceiling as though it were viewed from above and can help coordinate fixtures, exhaust fans, registers, and other ceiling elements.
Verify Fixture Specifications and Installation Requirements
Before ordering, confirm the actual model’s:
- Lumens
- Color temperature
- CRI
- Dimming capability
- Damp- or wet-location listing
- Mounting requirements
- Electrical requirements
- Energy-code information
- Manufacturer installation instructions
This step also helps prevent a visually preferred fixture from being selected for an installation it cannot support.
Plan the Lighting Alongside the Full Bathroom Remodel
In the City of Los Angeles, LADBS states that electrical permits are required for electrical work. Its current express-permit bulletin also identifies qualifying residential bathroom remodels without structural changes among work that may use the express permit process. That does not mean every bathroom follows the same path. Structural changes, expanded electrical scope, plumbing work, or other conditions may affect what approvals are required.
A Los Angeles mailing address also does not establish that LADBS is the authority. Properties in other incorporated cities or unincorporated Los Angeles County may be governed by different departments and local procedures.
For broader planning context, review SB Remodeling’s Los Angeles remodeling permit guide and project-planning process.
Frequently Asked Questions
How bright should bathroom lighting be?
There is no universal lumen number that works for every bathroom. Useful brightness depends on room dimensions, fixture distribution, surface colors, daylight, mirror placement, and the people using the space. Instead of relying on one high-output fixture, distribute light among vanity, ambient, and shower zones, then use appropriate controls to adjust the room for different activities.
What color temperature is best for bathroom lighting?
Many residential bathrooms use warm-to-neutral white lighting, often around 2700K to 3500K, but the best choice depends on the finishes and homeowner preference. Lower color temperatures appear warmer, while higher values appear cooler. Consistency among nearby fixtures is usually more important than selecting one supposedly universal number. Color rendering should also be considered at the vanity.
Can you install a recessed light above a shower?
A recessed light may be installed above a shower when the fixture, installation, and electrical design are appropriate for that location. Do not assume that every recessed fixture is suitable. Verify the environmental-location rating, manufacturer’s instructions, current electrical requirements, and any applicable energy-code provisions. Installation-specific questions should be evaluated by a qualified electrical professional.
Do all bathroom lights need to be damp-rated or wet-rated?
Not necessarily. The required environmental rating depends on the fixture’s actual location and exposure. Damp locations involve moisture or condensation, while wet locations involve conditions where water may drip, splash, or flow against electrical equipment. A fixture suitable for one portion of a bathroom may not be appropriate for another, so use the product listing and installation instructions rather than a bathroom-wide assumption.
Do bathroom lighting changes require a permit in Los Angeles?
For property within the City of Los Angeles, LADBS states that electrical permits are required for electrical work. The exact permit path depends on the scope. Qualifying nonstructural residential bathroom remodels may be eligible for an express permit, while other projects may require additional review or permits. Homes outside the City of Los Angeles should follow the requirements of the agency with jurisdiction over that property.
Coordinate Bathroom Lighting Before Construction
A successful bathroom lighting design is less about finding one impressive fixture and more about coordinating light where it is needed. Plan the vanity first, layer task and ambient illumination, treat the shower as a moisture-sensitive installation, compare lumens and color quality, and decide how each lighting zone will be controlled.
Most importantly, make those decisions before walls and ceilings are finished. Homeowners planning a Los Angeles bathroom remodel can schedule a virtual consultation with SB Remodeling to discuss the bathroom layout, lighting coordination, finishes, preliminary scope, and next planning steps.